Covering a Window Well
This weekend I made a quick project for a friend. Its a cover to fit over one of his basement window wells. Its designed to allow light to come in, but keep rain and snow out.
 |
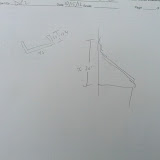
| The wooden carcass for the window cover. |
To make the well, I built a simple frame from 1/2" plywood. To join the frame, I used sections of dimensional lumber and screwed both faces in, rather than try to pocket screw or screw into the end grain of the thin, 1/2" plywood. The back of the frame was cut as an inverted "U" shape so as not to block the water. On the top, pitched surface I installed 1-1/2" wide strips to support the Lexan top. I place one of these strips on each end and one in the middle.
 |
Fabricating the aluminum was much easier using commercial equipment
such as this finger brake. |
Once the wooden carcass was done, I then clad the sides and front apron in .040 aluminum. The aluminum extends 2" down passed the sides and front to lap over and seal the joint between the wooden window well cover carcass and the masonry window well. I also covered the center support strip. It didnt need the aluminum from a waterproof perspective, but I though the clean white surface looked much better than plywood. To fabricate the aluminum, I used our commercial sheer and brake at work. Using commercial sheet metal equipment is much faster and cleaner than forming each piece by hand. Once formed I attached each piece to the carcass with neoprene gasketed stainless steel screws.
 |
| I was careful not to crack the Lexan when I drilled out for the fasteners. |
When I installed the Lexan top, I ran a thin bead of M-1 sealant under each side to seal it. Since its a water shedding design, the bottom didnt need to be sealed. The overlap at the bottom is sufficient to keep water out.
At the top edge the aluminum trim fits over, rather than under, the Lexan to shed water.
 |
| Dry fitting the cover over the window well. |
The entire assembly rests loosely on the existing masonry window well. In order to keep water which may run down the wall from running behind the cover, as separate, nail-on counter-flashing was installed on the wall. Its sealed with a non-curing butyl mastic under compression and more M-1 to prevent water entry.
 |
The nail-on counter-flashing is the only part actually attached to the house.
The top trim of the window well cover extends behind it. |
The top of the cover extend behind the nail-on counter-flashing. This properly sheds water while allowing the cover to be removed if and when its necessary.
 |
| The completed cover, installed over the window well. |
This wasnt the most existing of woodworking projects, but I did get to use my track saw and I do like working with sheet metal. Most importantly, its a simple project that should help my friend out and keep his basement dry.
 |
| Basement Window Well Cover |
No comments:
Post a Comment